|
It is currently Fri Apr 26, 2024 4:59 pm
|
View unanswered posts | View active topics
 |
|
 |
|
| Author |
Message |
|
Turbocharged400sbc
|
 Posted: Mon Dec 26, 2005 4:46 pm |
| TOC Member |
 |
 |
Joined: Wed Aug 18, 2004 12:53 am
Posts: 326
|
OK here we go...
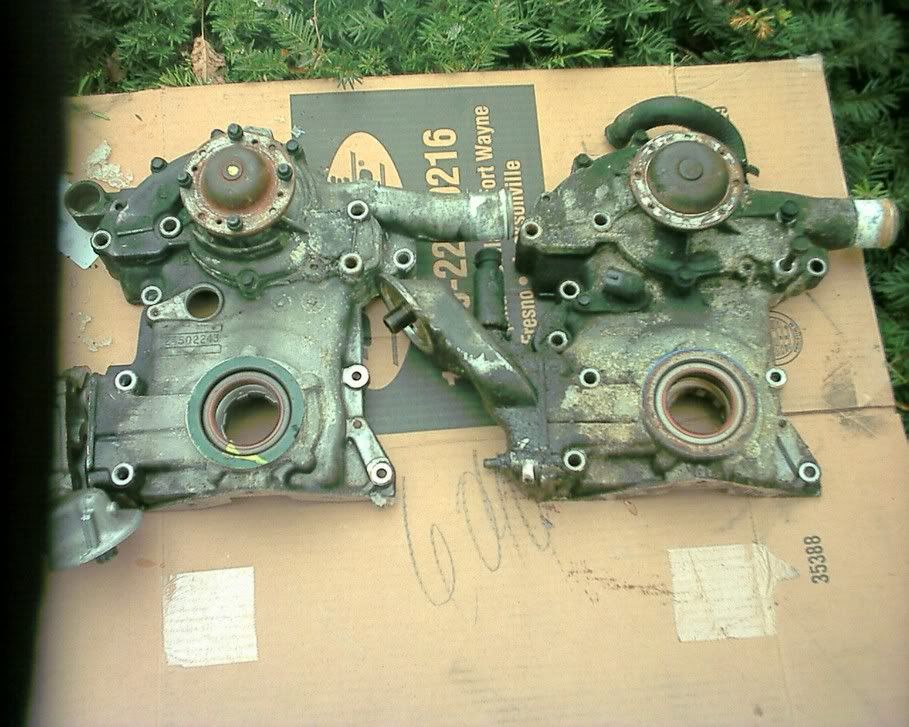
the SII cover on the left and the SI cover is on the right...essentially the covers are the same but Al's fingers are pointing to the major difference...the SII cover has one bolt hole deleted and the other moved...
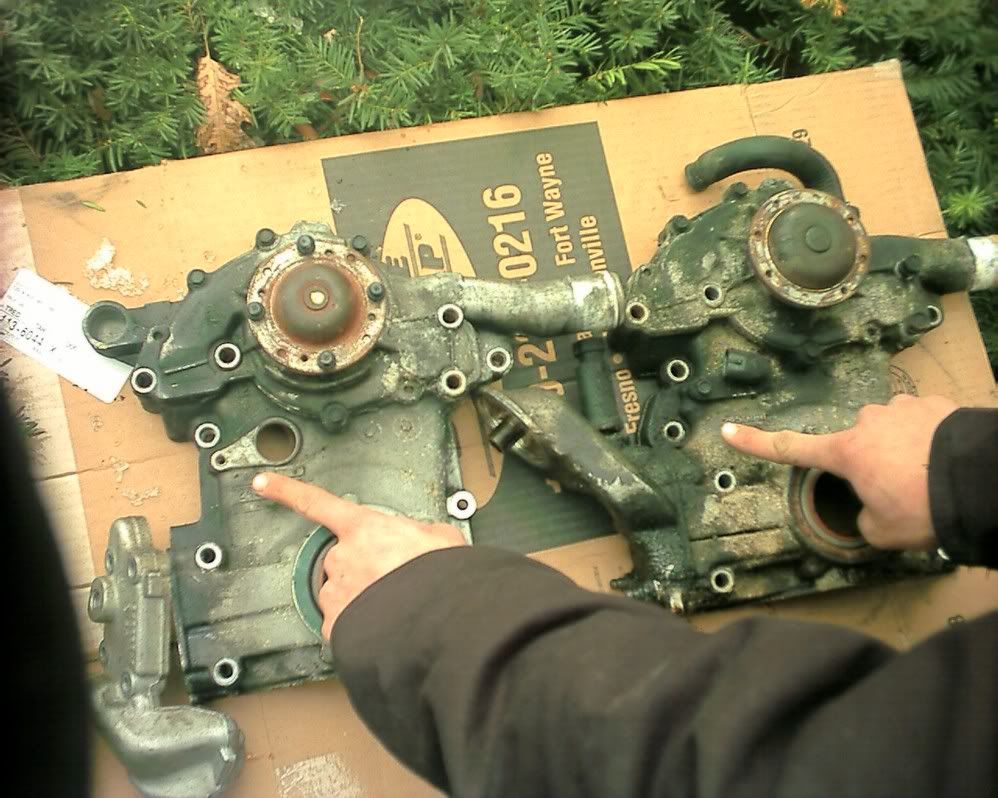
by now you have rfigured that the cleaner piece is the SII cover...the filthy one the SI unit...here are the two oil filter mount units...both are interchangable between covers (W body unit on the filthy SI cover.)
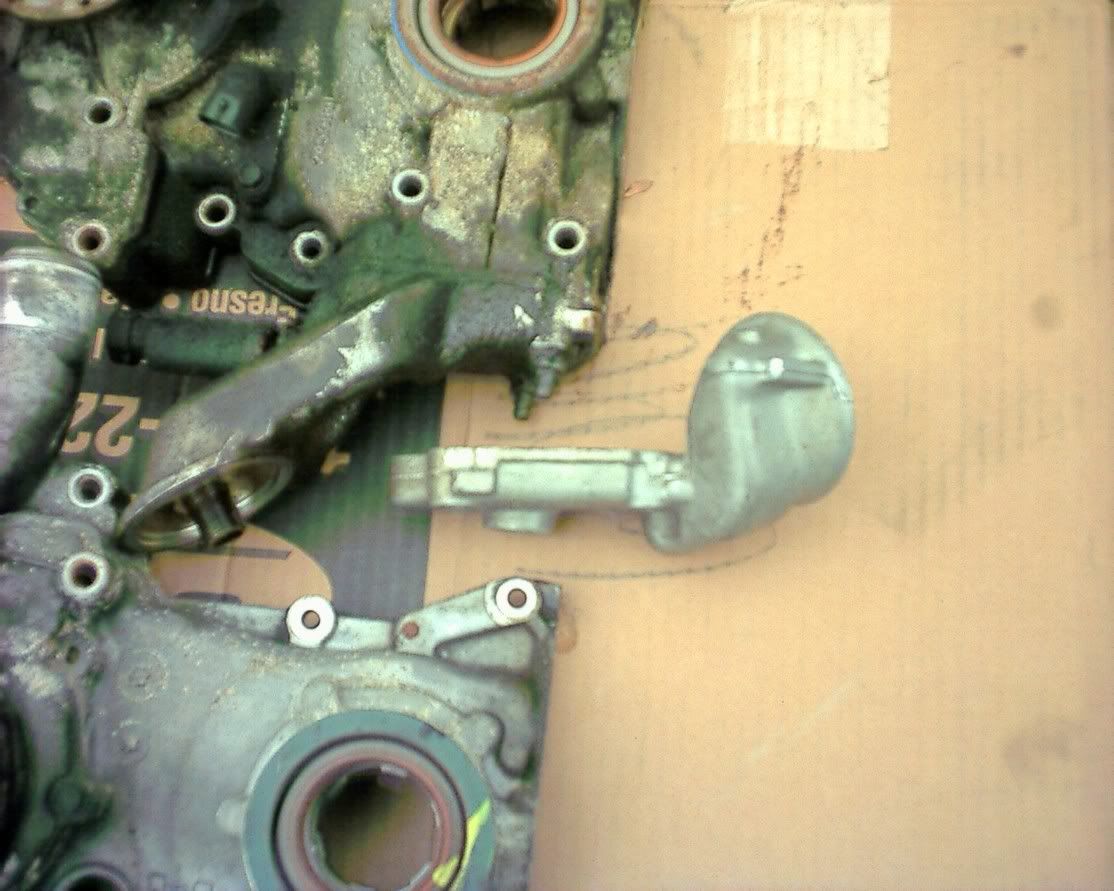
here is a side by side view of the SII and SI covers near the oil filter adapter mountings here also you can see the (minor) differences between the two units
here are the fronts of the covers...you can see that the cam sensors are in the same spots as well as the small differences between the two water pumps...and the same mounting points for the crank sensors between the two covers.
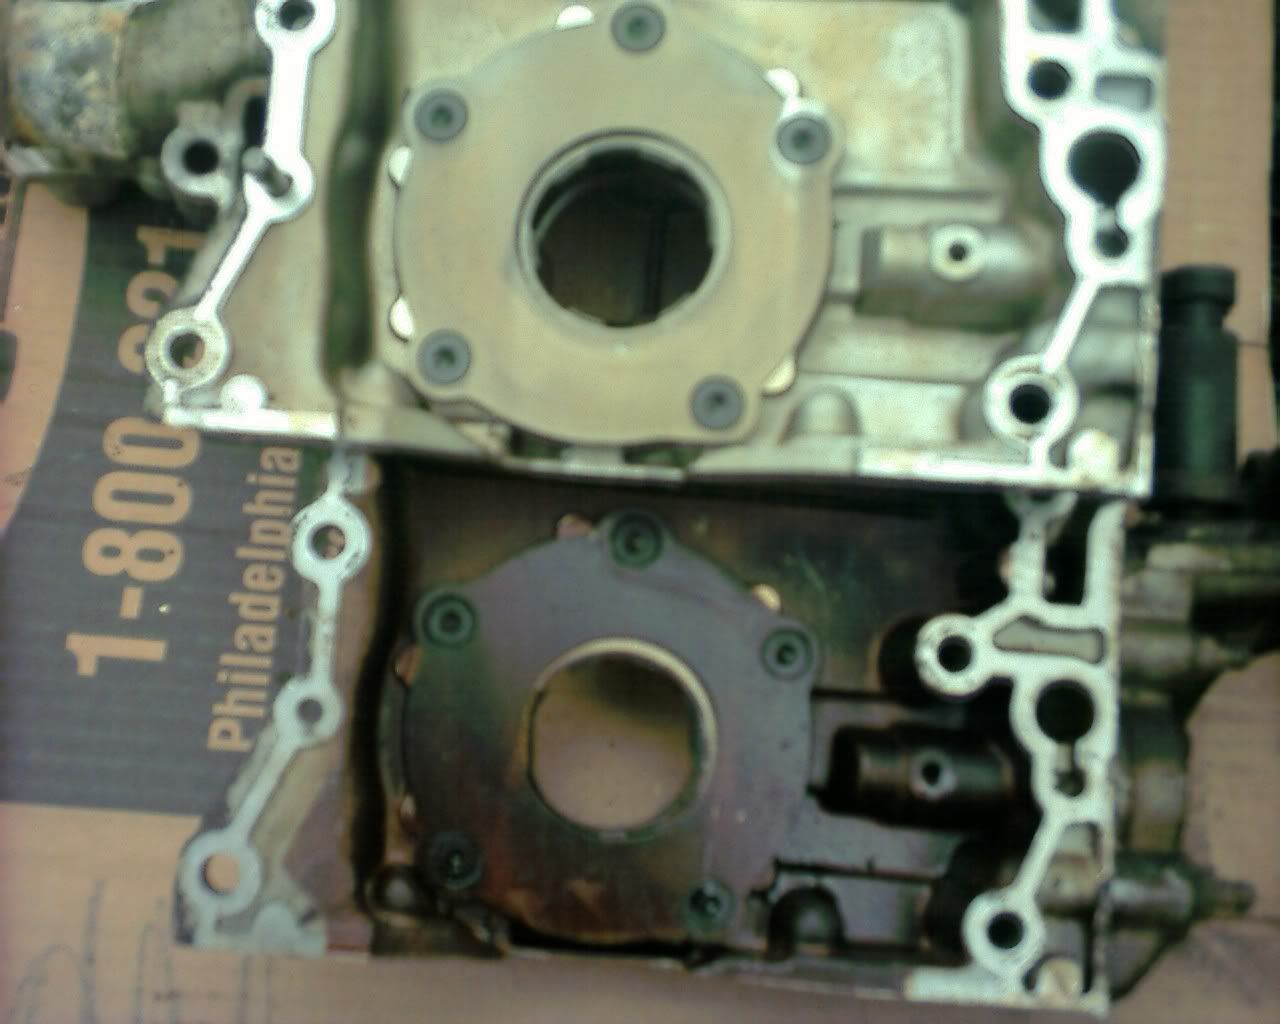
Here you can see the identical oil pump assemblies...the SI cover pump driven by two flats on the crank gear...and the SII unit driven by 6 splines, the pumps are identical otherwise...
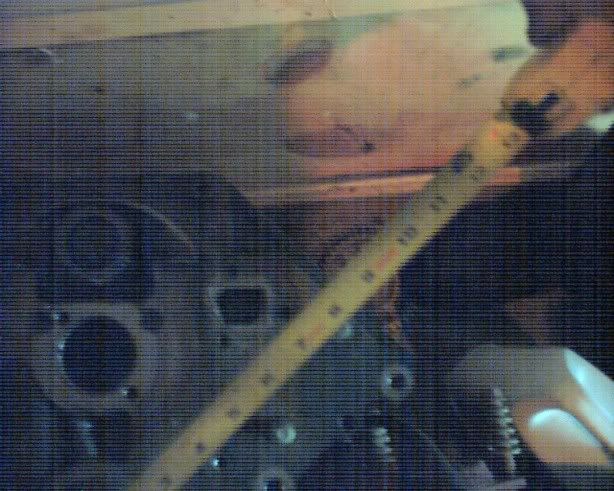
here is a crappy shot of the SII deck height measurment/timing chain area
and here is Al in front of the 442 and his V8 S10

and a quick shot of the drivers cockpit
and here is the empty engine compartment of the (formerly) 4wd S10 Blazer...That is getting a 400cid SBC 
_________________ Psychotic Gearhead/Redneck/Mekanik

94 Olds 442 Twin engine's! 6.9L/425 cu inches and 12 cylinders!

13.81 @ over 98 MPH! consistent 1.9s 60'! |
|

|
|
 |
|
88 Coupe
|
Posted: Tue Dec 27, 2005 4:02 am |
| TOC Member |
 |
 |
Joined: Sun Feb 15, 2004 3:25 am
Posts: 3196
Images: 10
Location: Southern California
|
Hi James, all,
Turbocharged400sbc wrote: ........ two oil filter mount units...both are interchangable between covers ........
May or may not come in handy, but it's a good thing to know.
I used one from a '62 Buick V6 to relocate the filter on the Olds V8 in my Toyota Corona. Avoided the BFH/smokewrench, and helped me keep it looking like a factory install.
Thanks for the update.
Regards, Norm
_________________ Harry S. Truman wrote: When you have an efficient government, you have a dictatorship. |
|
|
|
|
|
|
Turbocharged400sbc
|
Posted: Tue Dec 27, 2005 12:13 pm |
| TOC Member |
|
|
Joined: Wed Aug 18, 2004 12:53 am
Posts: 326
|
88 Coupe wrote: Hi James, all, Turbocharged400sbc wrote: ........ two oil filter mount units...both are interchangable between covers ........ May or may not come in handy, but it's a good thing to know. ....Regards, Norm I already have a Holden guy that wants the shiny (cleeaner) oil filter adaptor for his 3800 swap into an older car (and there may be a few others......unibody frame tube hits his current Holden unit and he's never seen one like the american version...which looks like it would fit perfectly.... 
now i am waiting to hear how much it would cost to ship a sub 1 lb chunk of aluminum to australia in a small box.... 
_________________ Psychotic Gearhead/Redneck/Mekanik
94 Olds 442 Twin engine's! 6.9L/425 cu inches and 12 cylinders!
13.81 @ over 98 MPH! consistent 1.9s 60'! |
|
|
|
|
|
|
88 Coupe
|
Posted: Tue Dec 27, 2005 3:02 pm |
| TOC Member |
|
|
Joined: Sun Feb 15, 2004 3:25 am
Posts: 3196
Images: 10
Location: Southern California
|
Quote: ........ waiting to hear how much it would cost to ship a sub 1 lb chunk of aluminum to australia........
In his case: "Cheap at twice the price".
Norm
_________________ Harry S. Truman wrote: When you have an efficient government, you have a dictatorship. |
|
|
|
|
|
|
Turbocharged400sbc
|
Posted: Sat Mar 11, 2006 11:27 am |
| TOC Member |
|
|
Joined: Wed Aug 18, 2004 12:53 am
Posts: 326
|
Update!
i have a set of 00 impalla heads and misc pieces (w body SII rear manifold LIM etc) and have done a prelim mockup...boy does it look good it looks like 8 of the pushrods (SI, the SII are way to short by the same amount the SII deck was shortened) are able to preload the lifters to spec 2 more pushrods will be close and the last two may need a little more length for proper lifter preload, also it looks like i need to grind the pushrod passthrough holes for those 4 oddball pushrods but thankfully this engine doesnt use guidplates etc and has pedestal mount rockers that makes my job easier
i'll tell you this much...it sure is lonely from here on out as i am now at the point that Locksmiff stopped his to persue other work...
one cool thing i have found is that the smaller cam journal blocks (SI and supposedly 95-96 SII) can be turned into roller cam bearing by some small cam tunnel machining and just a hair off the cam journals to fit and use the "off the shelf" roller bearings i found...dont know about the large journal SII stuff but it is an interesting way to further reduce cam bearing friction as well as (with restricters) making sure the bottom end gets all the oil it needs as the roller cam bearings will require less oil. yes i have been looking at alot of ways to make a better "mouse trap" lol, including minimizing windage to free up more power...
I guess thats the majority of the update...James
_________________ Psychotic Gearhead/Redneck/Mekanik
94 Olds 442 Twin engine's! 6.9L/425 cu inches and 12 cylinders!
13.81 @ over 98 MPH! consistent 1.9s 60'! |
|
|
|
|
|
|
88 Coupe
|
Posted: Sun Mar 12, 2006 3:38 am |
| TOC Member |
|
|
Joined: Sun Feb 15, 2004 3:25 am
Posts: 3196
Images: 10
Location: Southern California
|
Hi Turbocharged400sb, All,
Quote: ........ it sure is lonely from here on out ........ It's what separates the men from the boys. Quote: ........ that the smaller cam journal blocks ........ can be turned into roller cam bearings ........ and use the "off the shelf" roller bearings ........ including minimizing windage to free up more power ........
This is why you have my respect, and the A$$hat that writes a check for a bunch of "aftermarket parts" that someone else engineered, doesn't.
Then again, you might say I'm just "Old School".
Looking forward to your next installment.
Regards, Norm
_________________ Harry S. Truman wrote: When you have an efficient government, you have a dictatorship. |
|
|
|
|
|
|
Turbocharged400sbc
|
Posted: Mon Mar 13, 2006 1:41 am |
| TOC Member |
|
|
Joined: Wed Aug 18, 2004 12:53 am
Posts: 326
|
88 Coupe wrote: Hi Turbocharged400sb, All, Quote: ........ it sure is lonely from here on out ........ It's what separates the men from the boys. Quote: ........ that the smaller cam journal blocks ........ can be turned into roller cam bearings ........ and use the "off the shelf" roller bearings ........ including minimizing windage to free up more power ........ This is why you have my respect, and the A$$hat that writes a check for a bunch of "aftermarket parts" that someone else engineered, doesn't. Then again, you might say I'm just "Old School". Looking forward to your next installment. Regards, Norm i honestly cant belive no one has done this before...there is no way that some GM tech/engineer hasent figured out that you could put the SII heads on the tall deck/long rod block with a custom cam and intake spacers...oh and lengthening the exhaust manifold crosover pipe...
ask and ye shale recieve...i have 58 new pics....
Just a tease....fer now ...these are the hot ones
 10 pic flash strip of SI tall deck/long rod block/pushrods with SII DE larger valve/symetrical port heads
_________________ Psychotic Gearhead/Redneck/Mekanik
94 Olds 442 Twin engine's! 6.9L/425 cu inches and 12 cylinders!
13.81 @ over 98 MPH! consistent 1.9s 60'! |
|
|
|
|
|
|
88 Coupe
|
Posted: Mon Mar 13, 2006 3:36 am |
| TOC Member |
|
|
Joined: Sun Feb 15, 2004 3:25 am
Posts: 3196
Images: 10
Location: Southern California
|
Turbocharged400sbc wrote: ........ there is no way that some GM tech/engineer hasn't figured out that you could put the SII heads on the tall deck/long rod block ........ They would have known it better than you and I. The assignment was to make the engine smaller and increase the power. That's what they did. Quote: ........ have 58 new pics ........
When posting pics, quantity does not make up for the lack of quality.
Roughly, what are the differences in the rod lengths, pin diameters, compression heights, and dish CCs?
Regards, Norm
_________________ Harry S. Truman wrote: When you have an efficient government, you have a dictatorship. |
|
|
|
|
|
|
Turbocharged400sbc
|
Posted: Mon Mar 13, 2006 5:02 am |
| TOC Member |
|
|
Joined: Wed Aug 18, 2004 12:53 am
Posts: 326
|
A 1 inch taller deck height SI shortblock, that has a rod ~5/8 inch longer and could be made even longer with a custom SII piston with a compact ring stack but with the SI wrist pin bore (larger OD, but with good materials can be made thinwall as the SII factory pins but stronger due to the larger OD)
here's some number's
the SI rod length is ~ 6 3/8" center to center
the SII is only ~5 3/4 center to center (ballparking here, i am still pulling rods/pistons apart for proper measurements and comparison to other factory rod specs for say a stoke increase/decrease)
SI rod/stoke ratio is ~1.87
SII rod/stroke ratio ~1.69
now in the sportsman ranks, more than ever prostock technology (and modern engine theory) has been filtering down thanks to new breakthroughs (the new "Wet" Flowbenches, have been revolutionizing combustion chamber design) allot of those engines utilize the longest rod that can fit in the available space...and tall deckheights are coveted especially when stroking the engine to a larger displacement which requires a shorter rod...small base circle cams etc. and a tight piston ring pack placement (also far enough from the crown to help strengthen the top ring land)
now with a SII block Stroked to 4200cc's (3.75 stroke) has ~ 1.48 rod/stroke ratio with a 5.75 rod length (OE 5.75)
a SI tall deck block (with a stock compression height piston) stroked to displace 4200cc's (3.75 stroke) has a ~1.65 rod/stroke ratio with a 6.2 rod (OE 6.375). and with a piston compression height similar to the SII 3800 you could theoretically fit a ~6.5 inch rod and have a ~1.73 R/S ratio
a SI tall deck block with it's longer length rods means that when the 3800 is stroked to 4.2L the rod/stroke ratio is only slightly worse than a stock stroke SII! and you can still fit longer rods than the 6.2 in the stroked SI 3800 with some custom piston work.
in a stroked SII block the low rod/stroke ratio is causing high cylinder wall thrust loading (friction and wear) as well as piston to crank clearance issues, to say the least...
if your interested in more info that is pertinent to this discussion to give you pro's and con's check this link, its pretty good though its mopar related :
http://victorylibrary.com/mopar/rod-tech-c.htm
I think my project is completely doable with relatively little work...and seeing as most engines get a custom camshaft ground anyway, having a SI lobe spacing pattern with the SII lobe Phasing/Valve pattern is relatively simple...no different than 4&7 firing order swap cams for small block chevy's.
i do apologize for the quality of the pics but i am usually greasy and i am not allowed to touch the good camera... 
as a stock shortblock the SI piston is more dished than the SII piston (guestimating 10+cc's-have to check soon) and with the SII heads provides a nice low compression ratio perfect fer boost...
James
_________________ Psychotic Gearhead/Redneck/Mekanik
94 Olds 442 Twin engine's! 6.9L/425 cu inches and 12 cylinders!
13.81 @ over 98 MPH! consistent 1.9s 60'! |
|
|
|
|
|
|
88 Coupe
|
Posted: Mon Mar 13, 2006 7:25 pm |
| TOC Member |
|
|
Joined: Sun Feb 15, 2004 3:25 am
Posts: 3196
Images: 10
Location: Southern California
|
Turbocharged400sbc wrote: ........ ballparking here ........ It's all I need. Not building anything yet, just looking at some possibilities. As I said before, my version would be unblown and I'd need to find the right car first. As we both know, "it's the whole package, not just the engine". Quote: ........ http://victorylibrary.com/mopar/rod-tech-c.htm ........ its pretty good though its mopar related ........ It's only "Mopar related" because it's on a Mopar site. Good infomation for a beginner, but, nothing that hasn't been around for decades. Quote: ........ a SI tall deck block with it's longer length rods means that when the 3800 is stroked to 4.2L the rod/stroke ratio is only slightly worse than a stock stroke SII ........ Any time you consider stroking, you need to get past the obvious torque gain, and think about how to increase valve area to compensate for the extra displacement. Not as important in a blown application, but still a factor. Piston speed isn't the primary reason RPM are limited in long stroke applications. Quote: ........ my project is completely doable with relatively little work ........ That's why I'm interested in your progress. I've never cared about cloning someone elses project, just interested in how they got there. Quote: ........ i do apologize for the quality of the pics ........
It was constructive criticism. An apology doesn't get more useful pics up. I know you are inventive enough to get past a little grease.
Regards, Norm
_________________ Harry S. Truman wrote: When you have an efficient government, you have a dictatorship. |
|
|
|
|
|
|
88 Coupe
|
Posted: Thu Mar 16, 2006 4:26 am |
| TOC Member |
|
|
Joined: Sun Feb 15, 2004 3:25 am
Posts: 3196
Images: 10
Location: Southern California
|
Hi Turbocharged400sbc, all,
Quote:
This is a much better presentation. Had to shrink them all down to screen size, but you posted the right ones. Captions help a bunch too.
Looks like "ssei1995" is one of us.
Regards, Norm
_________________ Harry S. Truman wrote: When you have an efficient government, you have a dictatorship. |
|
|
|
|
|
|
Turbocharged400sbc
|
Posted: Thu Mar 16, 2006 7:47 pm |
| TOC Member |
|
|
Joined: Wed Aug 18, 2004 12:53 am
Posts: 326
|
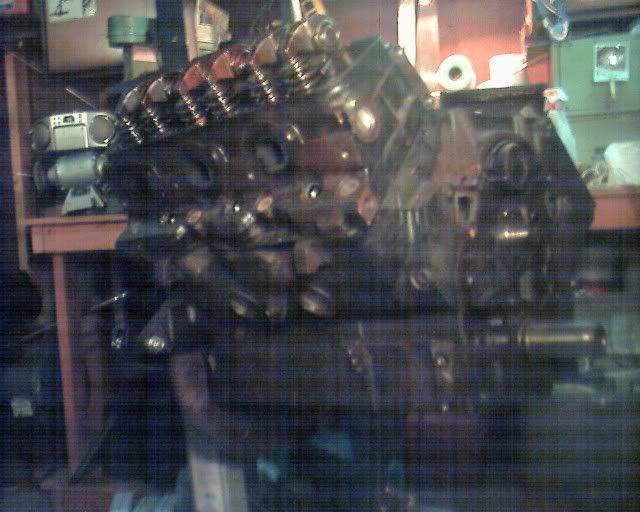
so far the longblock looks like all it needs:
is the ~13mm (1/2 inch) phenolic or alum intake port spacers (and the end oil seals will need spacers) phenolic would def be better
a custom grind camshaft SI bearing journal diameter and SI lifter bore spacing but with the SII lobe phasing...and since most with a tall deck stroker/turbo high performance engine would want a custom cam to get the most out of the engine this is a very minor cost (~250-350 USD dep on lobe pattern)
4 pushrods approx ~.010-.020 longer than stock SI pushrods for the higher angle pushrods (for proper lifter preload), which clear the head casting just fine after just a hair over 1mm was ground away from the outer edge of the port wall (see in pics below)
you will have to use wither the SI or SII balance shaft gear/Timing chain, Cam and crank gears on the SI crank/block, the cam retainer plates are identical thickness (3 bolts in SI only 2 in SII) and the cam snouts are the same, just different journnal diameters.
One thing to make clear, if if your deleting the balance shaft, or not, you have to use the SII cam gear with the SII balance shaft drive gear as the cam gear and balance shaft gear from either set are the same thickness you cannot mix the SI cam gear with the SII balance shaft drive gear or vis-a-ersa as they with be thicker/thinner than the required thickness.
also if your using the better smaller pitch SII Tchain/balance shaft gear, cam gear, crank gear you will have to install the SII oil pump into the SI cover (the drive arangment between the oil pump in the cover and the Tchain crank gears are different from SI to the SII.
accesory brackets look like you will be able to use all of the SI brackets with the SII heads with some minor customizing (and making a few parts "factory optional" )
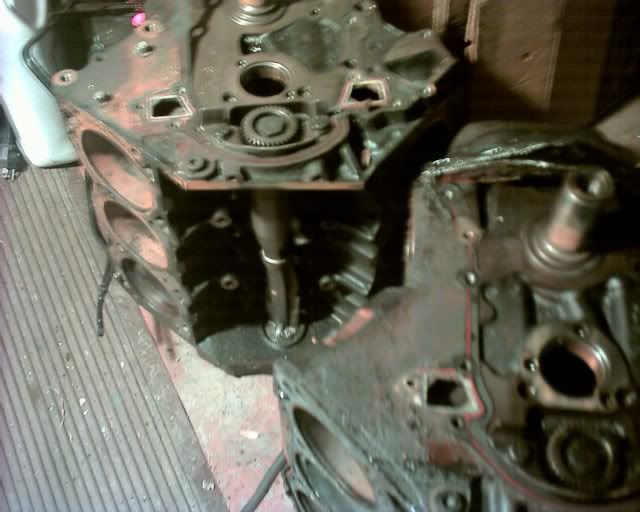
Ok lets start with the obvious stuff...
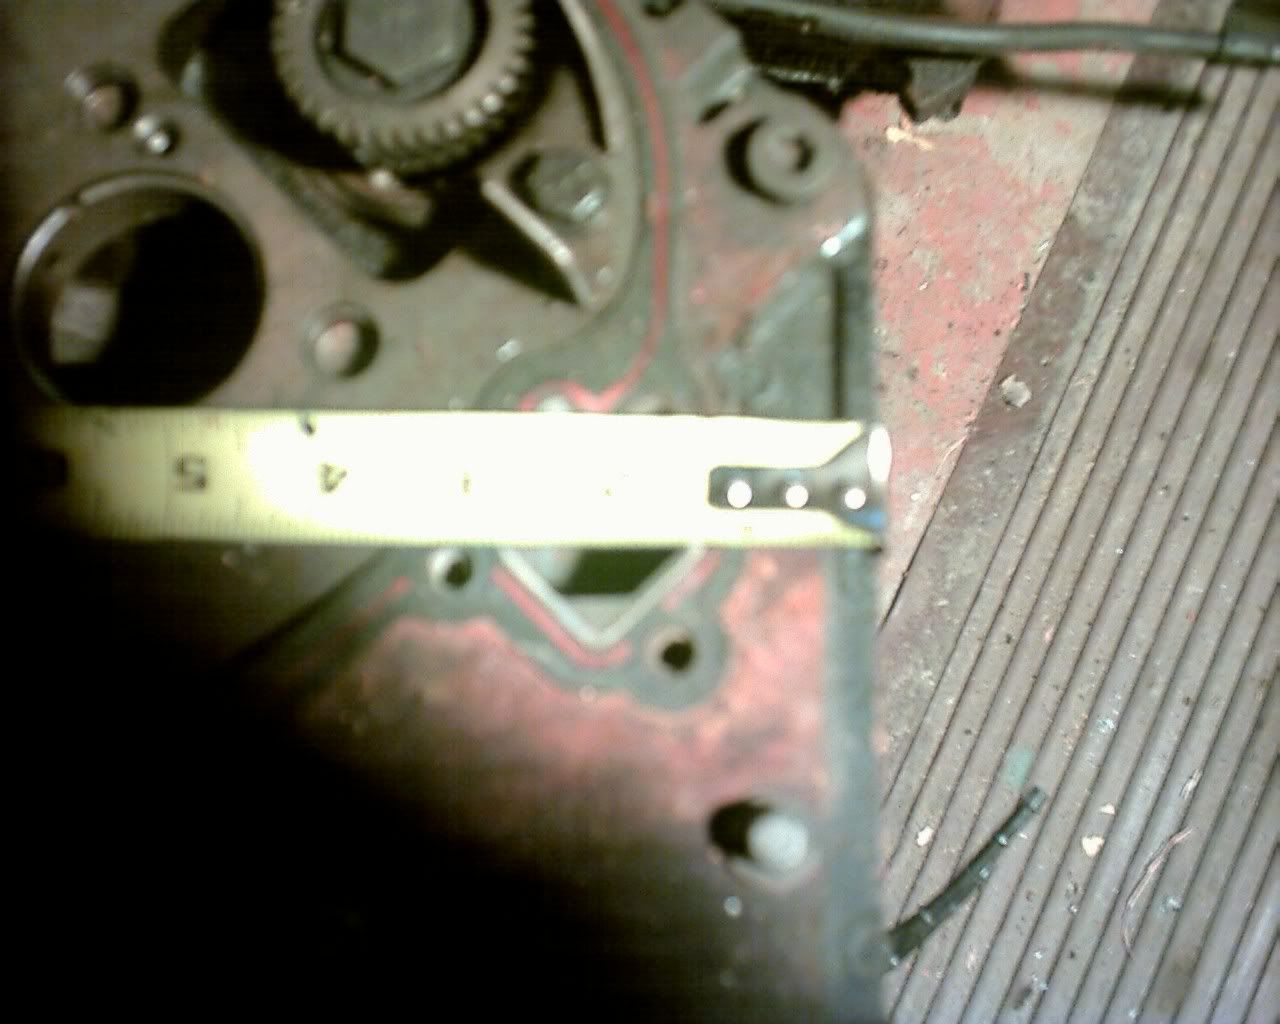
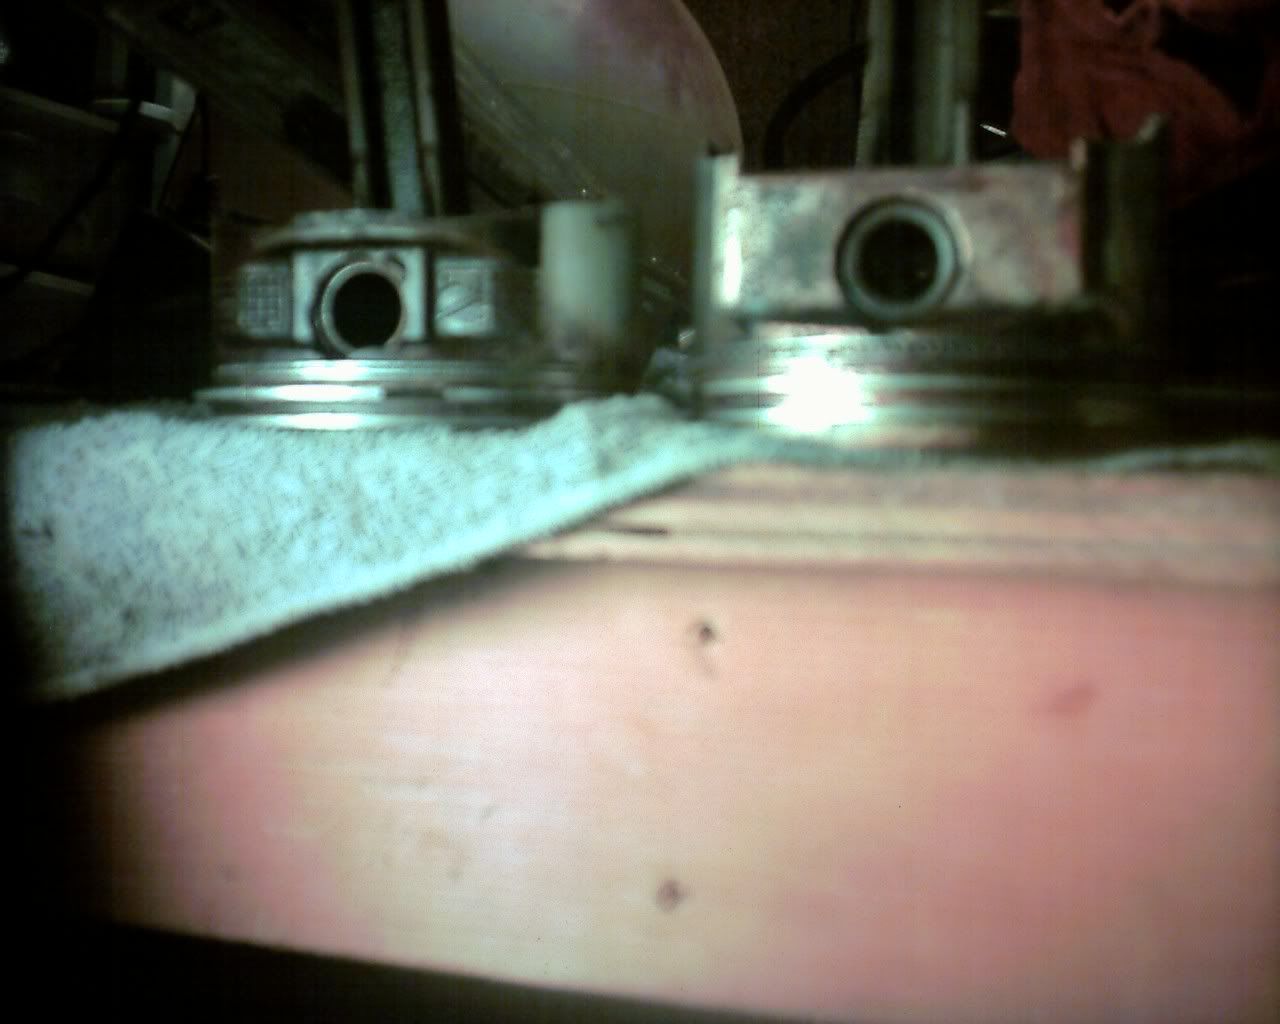
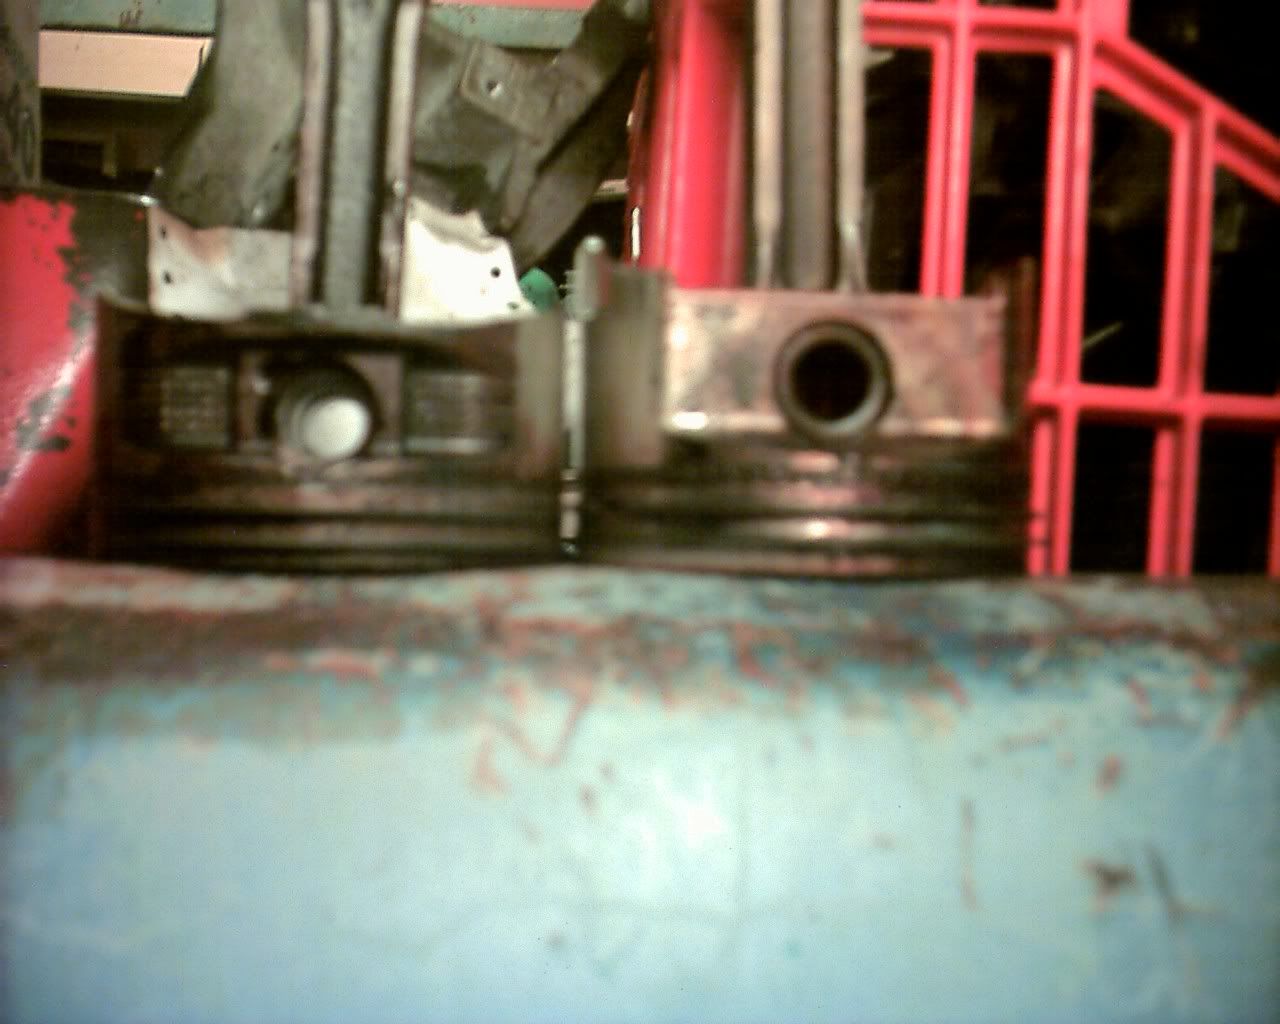
here are two pics of the different deck heights SI (1 inch taller) vs SII measured from the coolant port for the nearly identical timing chain covers....
SII
In these pics you will see a 93 EV6 SI short block next to a SII shortblock
in this pic you will notice the same skirt mount holes for the accesory brackets and other bolt locations and then you will see the other differences in bolt hole locations and the extra knock sensor boss.
SI block face:
SII block face
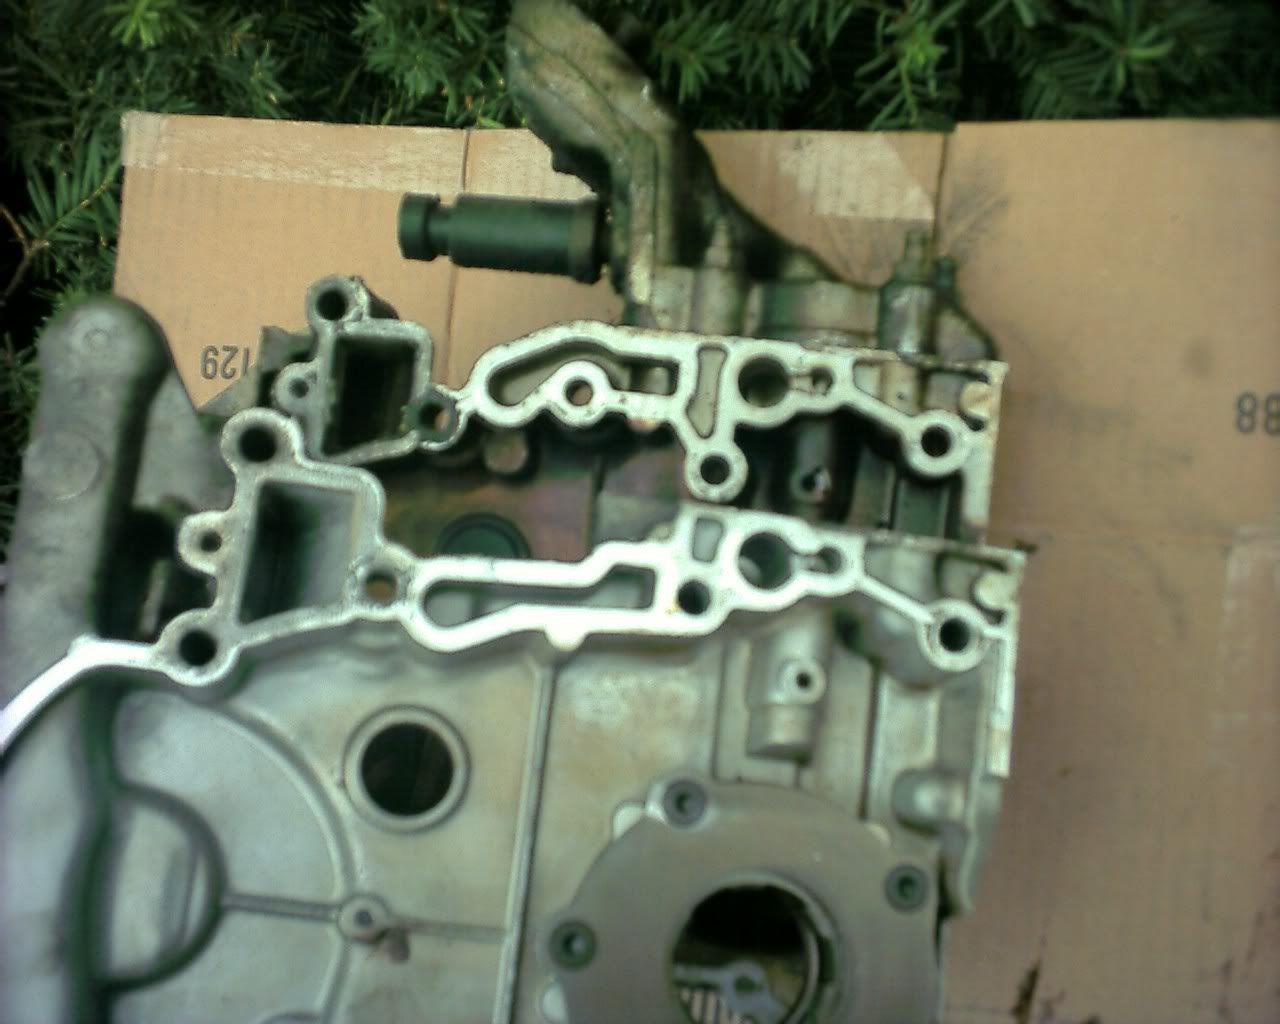
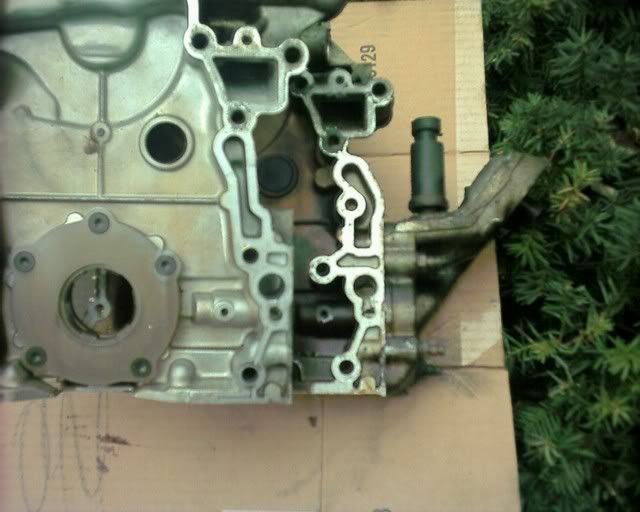
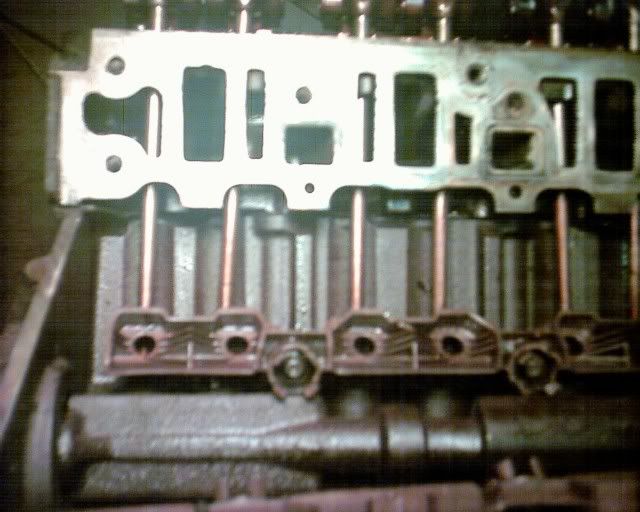
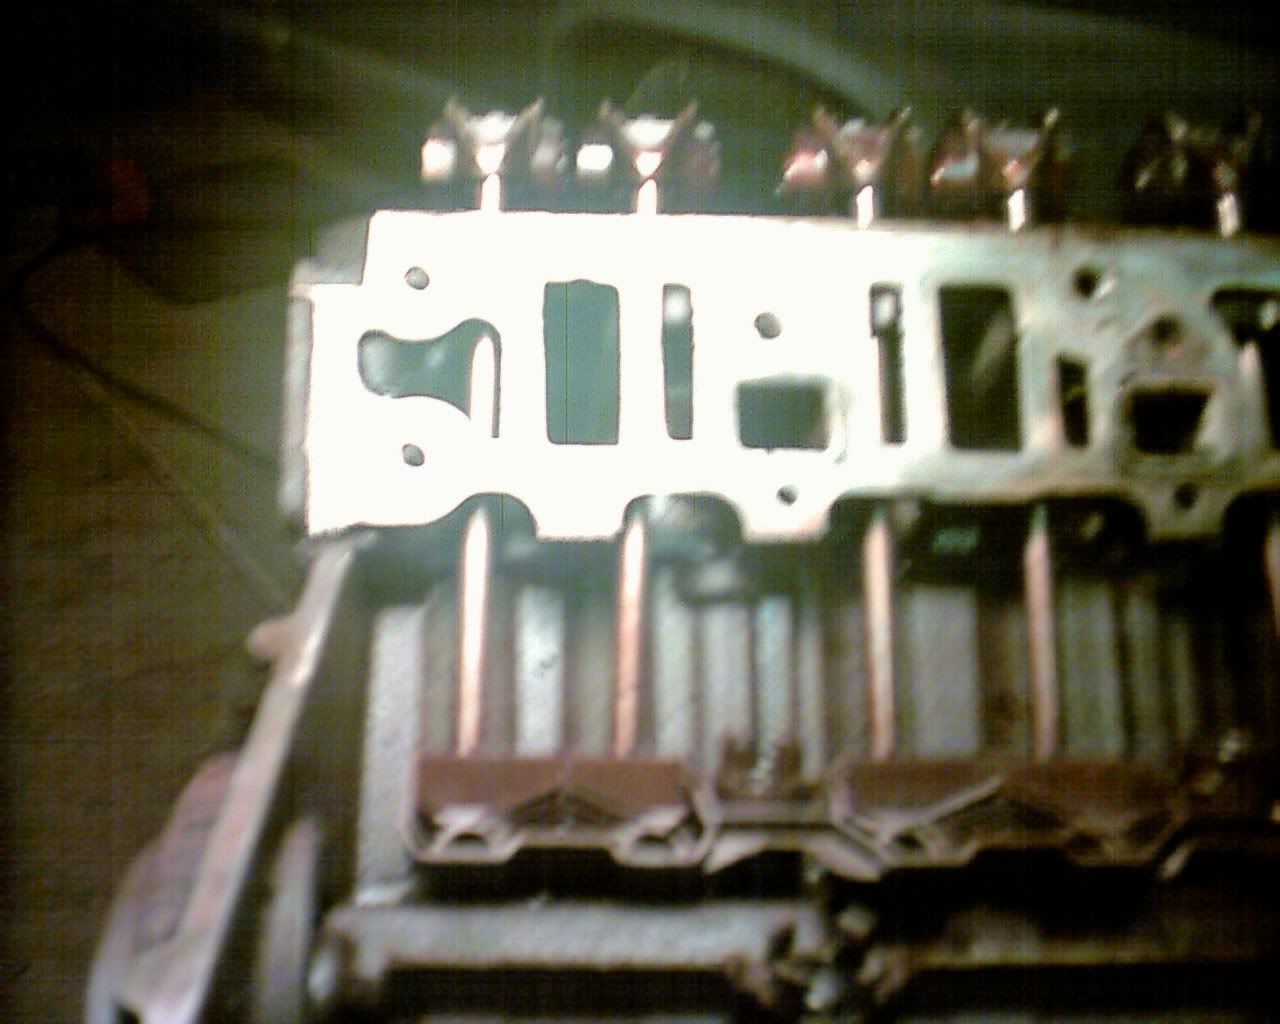
now to the headgaskets Here are some pics...try to guess which is which...lol
the SII is identical except for the slightly different valve reliefs in the combustion chamber fire-ring in the SII HG as well as it has the large area with triangles cutout for the pushrods to pass through.

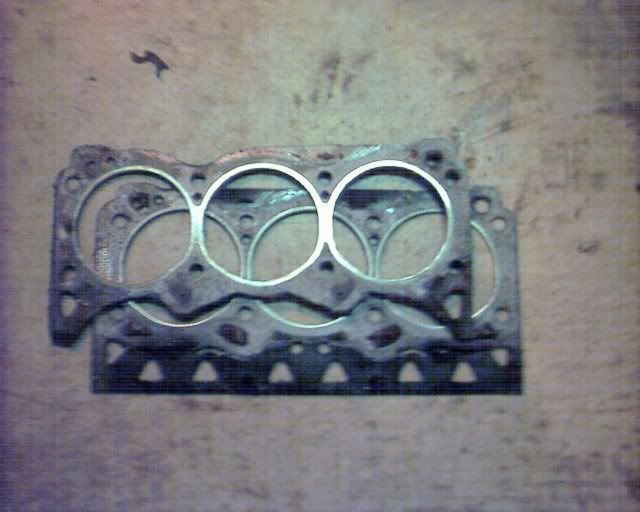
Here you wil see the SII headgasket on the SI block
Here you see the lifter offset from the SII lifter bore locations

And here is the SI gasket on the SI block
so far it looks like the SII gasket will have to be used as the SI gasket, though nearly identical, might shroud the valves and hinder flow.
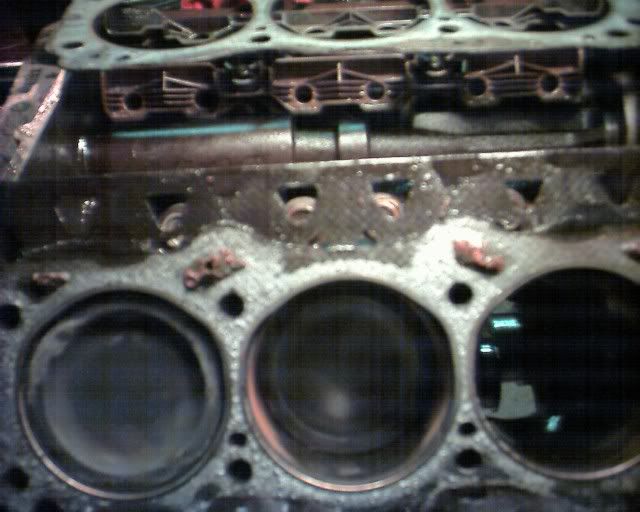
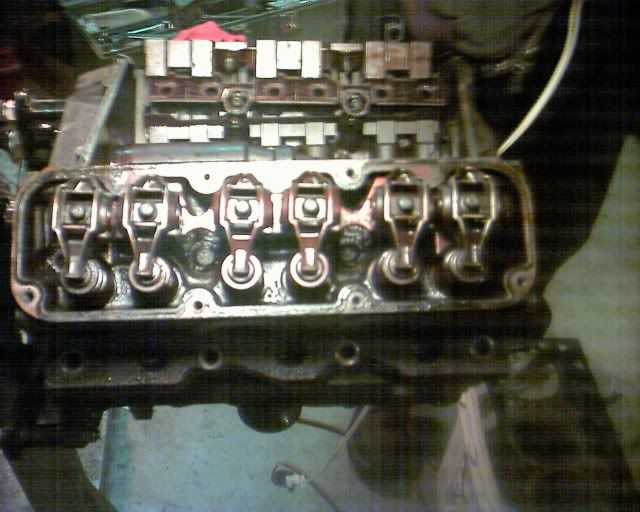
Here the 2000 SII head is bolted onto the SI EV6 block...those symetrical ports look right at home dont they...

Here is a 3/4 view:
and a rocker arm buisness end view
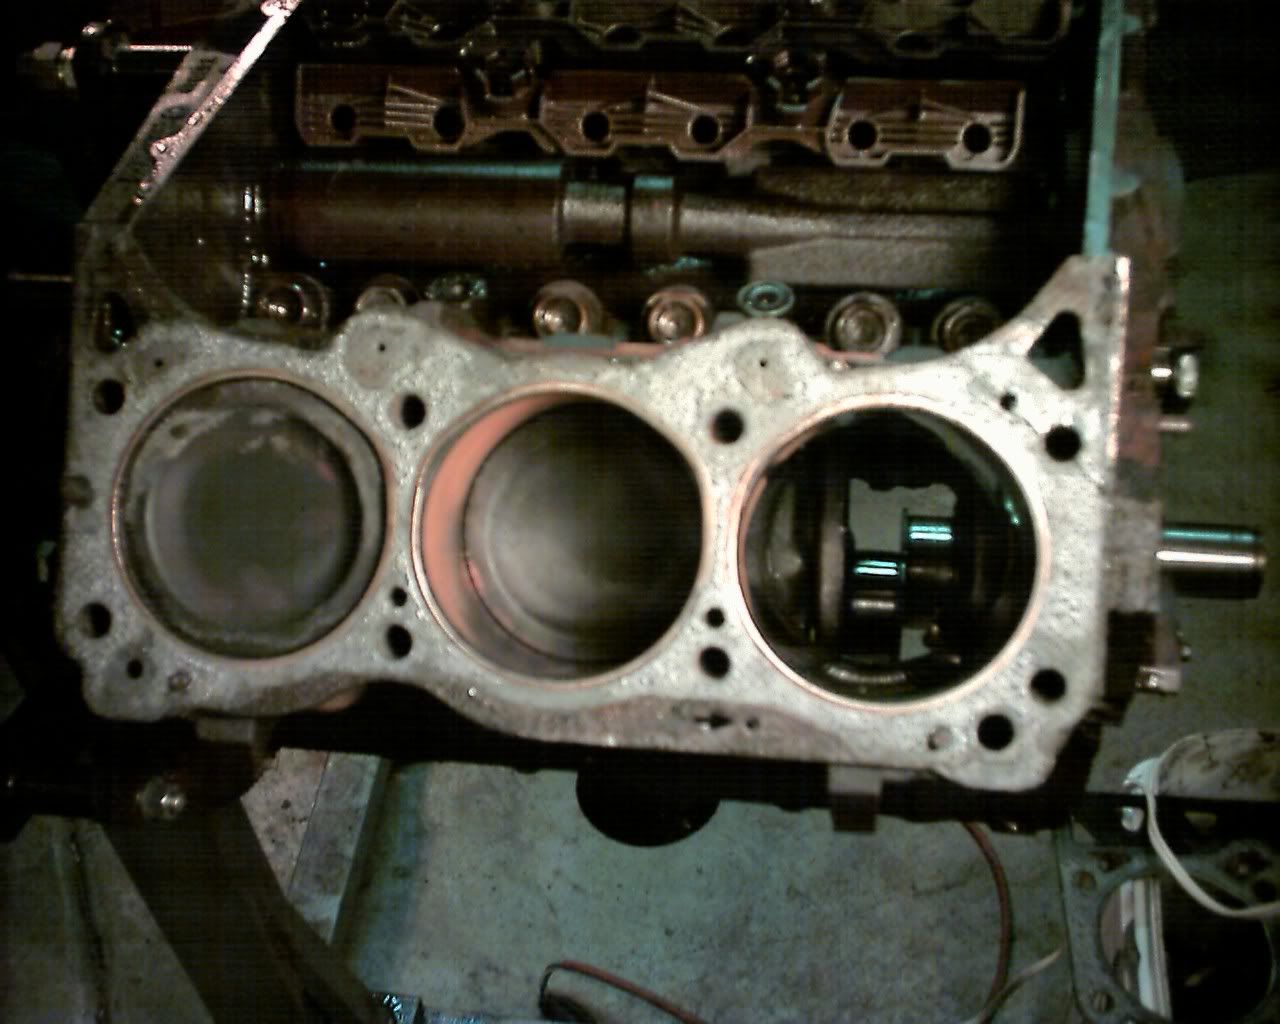
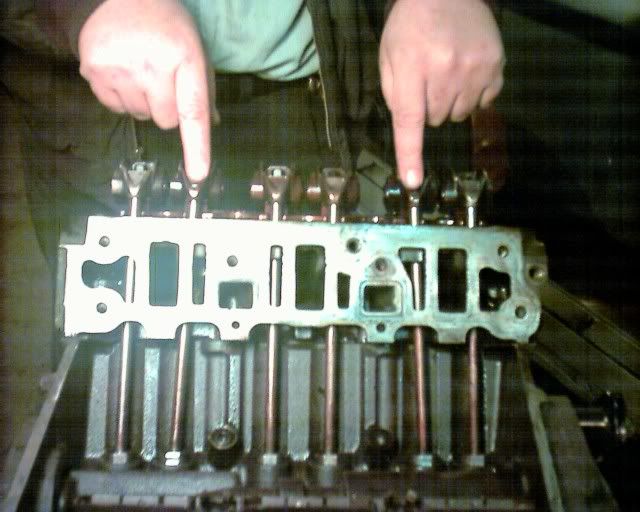
To further show the slight differences in lifter bore locations between the SI and SII blocks here is a SII lifter carrier above a SI carrier notice the center two are in perfect alignment
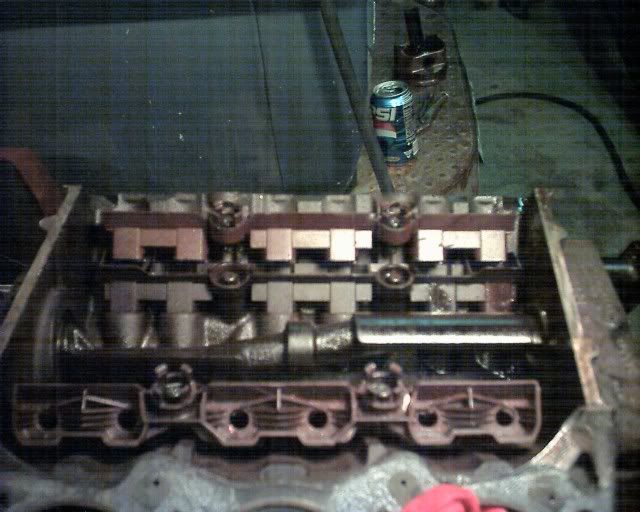
And here you see the two end lifter locations notice on the SII where the lifter bores were moved inward more on the inner lifter than the outer (end) lifter.
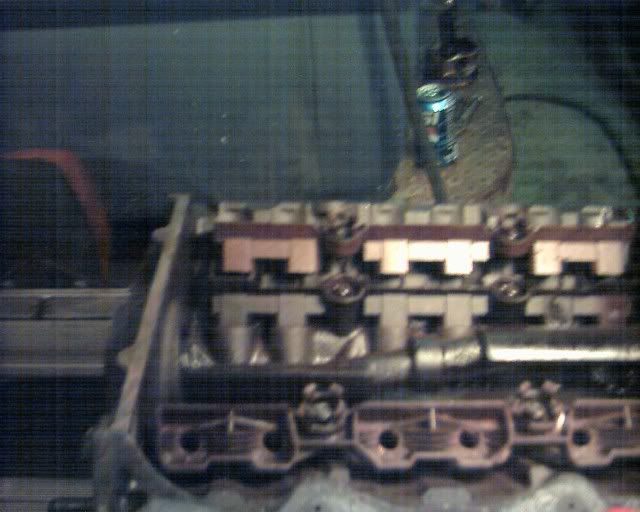
And here are the SI pushrods installed center two are at 0 degree's and the outboard 4 pushrods are at slight inward angles, the ones on the ends are at ~ 1.5-2 degree's and the ones inboard of the ends are at ~3.5 degree's and just slightly graze the edges of the intake port casting. This neccesitates grinding just a hair over 1mm from the outter port wall.
Lifter guide left off for clarity:
In this pic my buddy Donald is pointing to the two outter pushrods which are at the ~1.5-2 degree angle
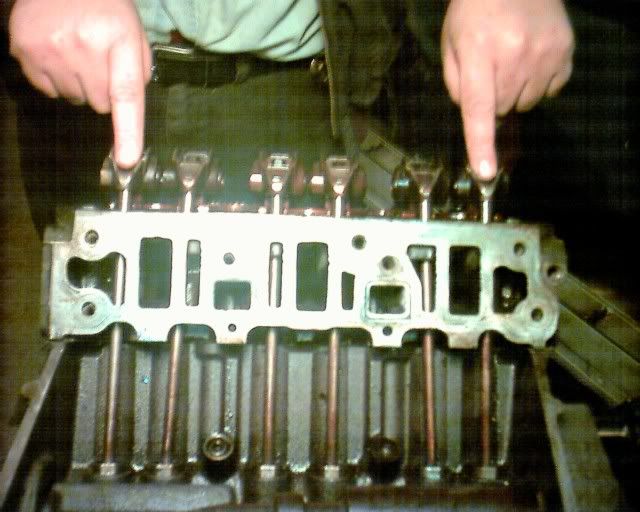
here he is pointing to the pushrods that are at ~ 3.5-4 degree's and that hit the outer port casting, this was fixed by removing just a bit over 1mm of metal about 1 cm tall from the outer port wall...
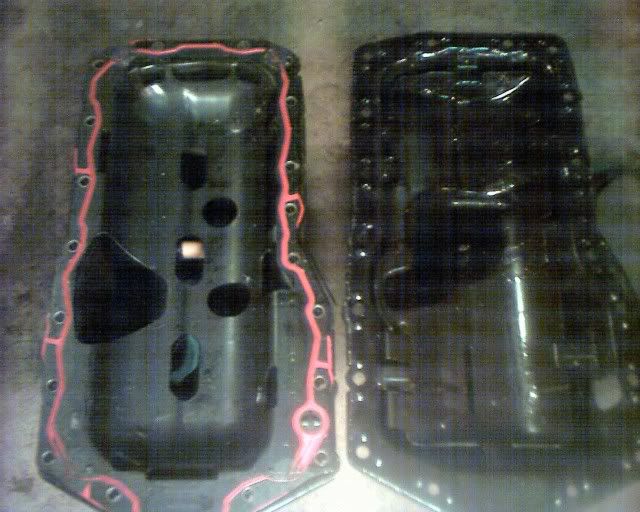
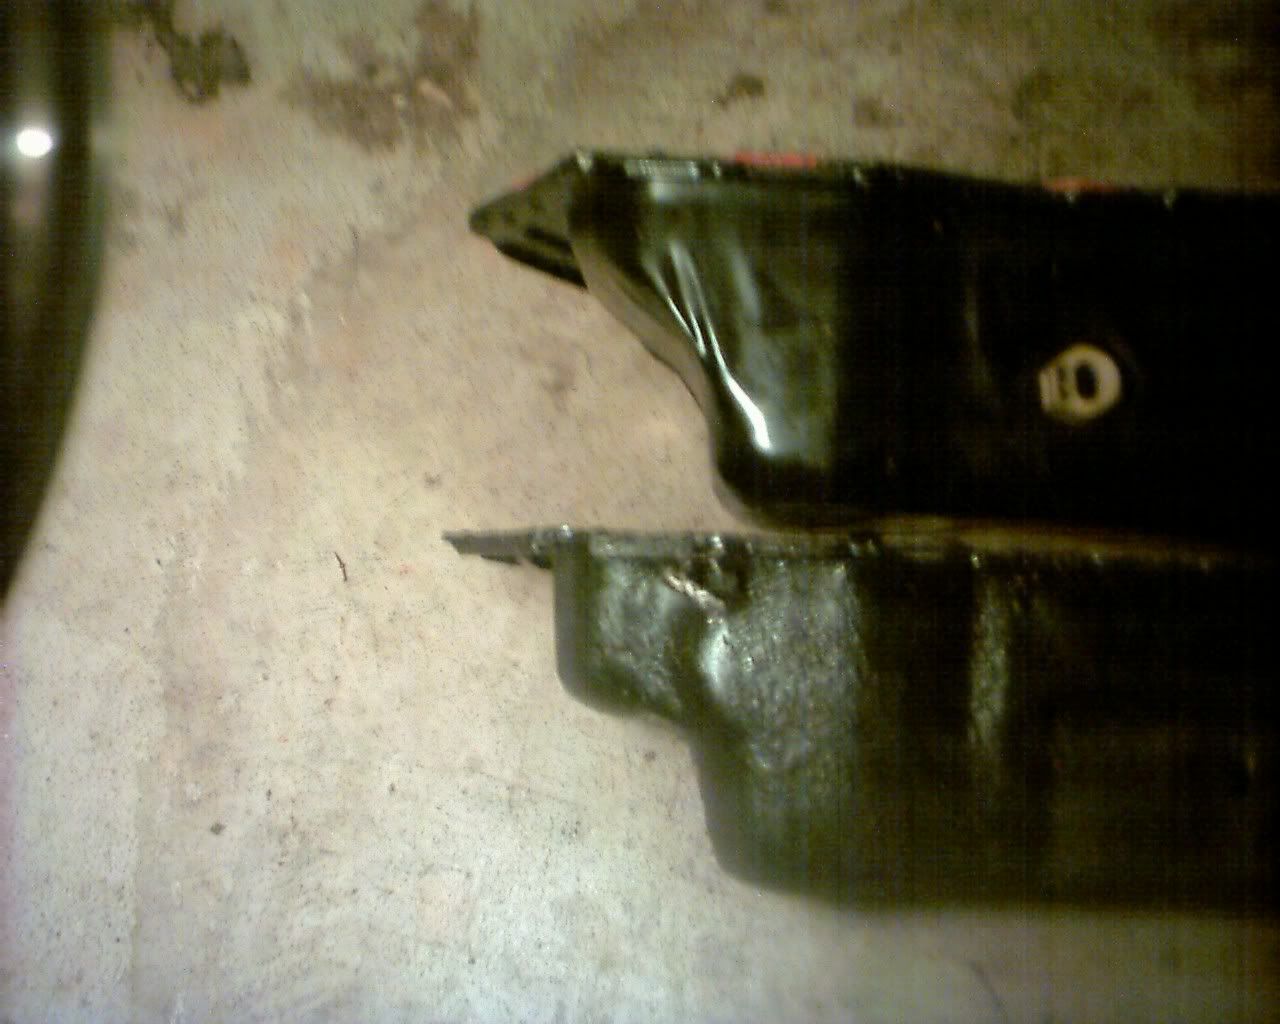
now the oilpans are even more interesting as the SI sump height is a little deeper and has a larger front sump section...both have identical bolt hole locations and pan rail widths...the major difference is the SI pan has an integral windage tray and the SII pan has the windage tray integral to the pan gasket carrier... (SI pan is on the right and bottom of the pics)
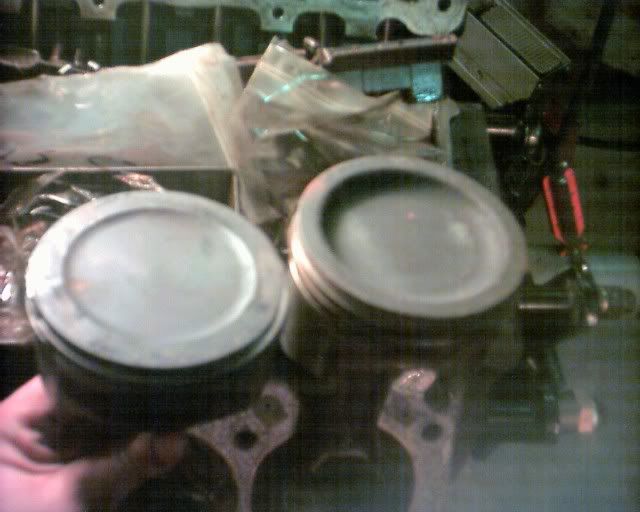
and the rods are next the SI rod being a longer rod by ~5/8ths of an inch (I have seen specs saying its .64 inches shorter) but i have to pull the pistons off the rods for more comparison. the SI rod has a thicker main beam and also has more material around the big end capscrew locations, besides being equipped with a larger dia piston wrist pin, this could be bushed to work for a floating pin application and probably use the SII wrist pin diameter. Also note where the SI piston also has a tall compression height that if the SII piston were put into a SI block you would be able to get the rod even longer by ~1/4 inch of an inch for an even better rod/stroke ratio
so if you used the SII piston (or an aftermarket) with the SI rod in a SI shortblock you could throw in a ~3.6 inch stroker crank and have all factory components without custom length rods etc.


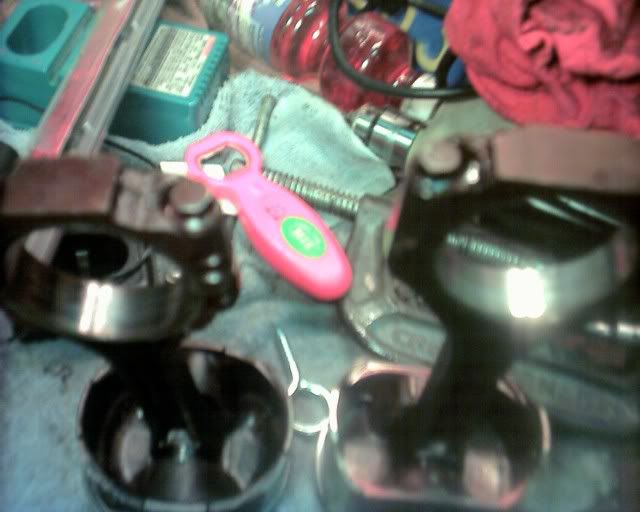
the SI piston on the right has a deeper dish with a top ring located lower and a taller oil scrapper ring, than the L36 piston on the left
and a through the bore view of the head/valves


thats enough fer now...more to come...
Regards, James
_________________ Psychotic Gearhead/Redneck/Mekanik
94 Olds 442 Twin engine's! 6.9L/425 cu inches and 12 cylinders!
13.81 @ over 98 MPH! consistent 1.9s 60'! |
|
|
|
|
|
|
88 Coupe
|
Posted: Thu Mar 16, 2006 10:08 pm |
| TOC Member |
|
|
Joined: Sun Feb 15, 2004 3:25 am
Posts: 3196
Images: 10
Location: Southern California
|
Hi James, all,
Good post.
Turbocharged400sbc wrote: ........ 4 pushrods approx ~.010-.020 longer than stock SI pushrods for the higher angle pushrods (for proper lifter preload) ........
Proper preload has been debated as long as we've had hyd lifters. Actually, factory settings are determined by production tolorances and allowances for long term wear. In your case, factory would be about a sixteenth, and an extra 20 thou longer on the PR wouldn't make any difference as .040 is well within the wear limits of the valvetrain.
OEM lifters in my 437 are at .010, and have worked fine for over 8 years, including a few 1/8 passes at 7000+ RPM, in second gear.
My third 215 and second 394 were at .020 and gave no problems.
I've always run my Chev hydraulics at 5 thou, but they are easily adjustable if I need to compensate for wear.
Having said that, custom PRs will be cheap insurance.
Regards, Norm
_________________ Harry S. Truman wrote: When you have an efficient government, you have a dictatorship. |
|
|
|
|
|
|
Turbocharged400sbc
|
Posted: Sat Apr 01, 2006 7:14 pm |
| TOC Member |
|
|
Joined: Wed Aug 18, 2004 12:53 am
Posts: 326
|
update on a side thought on this project, summary:
Quote: I have been thinking of using aluminum for the intake spacers i need for the SI/SII (EV6/Eco) hybrid, and this weekend while i was cutting 1/2 inch plywood for the mockup spacers...why not use phenolic material here to reduce intake temps?, i doubt the plywood would seal well without getting rid of the oring style gaskets and going to a thicker paper/felt type gasket etc. where are some good places to get 18 inch x 4 inch sheets of phenolic material in ~9/16ths to 1/2 inch thickness's??? i have searched the web and some companies want 145$ US for a 24x48 sheet of the stuff that is rated to 280* and 375$ US for 350* plus stuff!!! i dont think that this aplication needs a temp rating over 280* but the phenolic material must have a low moisture absorbtion factor (mostly glass fiber based phenolics...and special composits fit these needs but $$$$$$$) should i just stick with my idea of aluminum spacers and just using 2 SII intake gasket sets? or thickeralum spacer and swapping to hand made paper gaskets? or should i try to find some phenoilic material and use OE or handmade gaskets? i have the L36 (NA) SII lower intake but it def would suxor to cut it down the middle and widden it....which at that point would def require a custom sheet alum upper...prob best to stick with making spacers... I should have more pics once i am done with these mockup spacers and old intake gaskets... for proper thickness of the spacers (yes i have considered "Raising" the port angle to give the air a more direct shot at the back of the valve) in the final build I sent an email in regards, to this project to Outlawengineering.com WoW! talk about fast response! Quote: James,
You guys are nuts! I mean that in the best of ways. The twin engine Cutlass is too much! Talk about a double-edged sword!
Send a gasket over here and we'll see what we can do. We use a standard 1/4" thick composite, but we can certainly stack them to whatever thickness you may need. Just place another gasket between the spacers for now. I think we can fit you in for ~$100.
The composite will be fine, we run other spacers that have coolant passing through. I would suggest bypassing the coolant through the LIM if you can. With coolant going through the manifold, it will still get to ~180 degrees F.
Best regards,
Sean Morgan
Outlaw Engineering now this represents and interesting idea...dep on how thick exactly the spacers have to be, you would have to use some paper gaskets between the seperate 1/4inch plates (like bolt a stack together with a couple 4-40 screws and then put it on the engine...or maybe since you'd have to get two sets of LIM gaskets, just stack 4 of em...   lol i almost might be better off with using 3 oem replacment gaskets and two 1/4 inch aluminum pieces...use the gaskets as the phenolic insulators...of course this provides packaging/instalation problems and possibility of more leaks I hope i can find someone to give me an estimate on an actual 1/2 inch phenolic material to have the spacers made from. what are some of your opinions? just go with some ~ 1/2 inch thick aluminum spacers and the two LIM gaskets "acting" as phenolic insulators or should i see about some 1/2 phenolic material...what do you think would be the best, would the aluminum be that much less efficient than the phenolic that it would benifit to any large degree? maybe if i did remove the coolant passages from the intake (I have looked at the room available for running dedicated reverse cooling lines (AN8) from the front cover to the head coolant port and then into the blockseperate AN lines and use a thin blockoff plate at the W/P or and external mounted W/P) this would let the phenolics do their job better and i bet you could get U/LIM temps nearly ambient The other option is to go farther than just making my sheet alum UIM for the L36 LIM, and make the whole damn mess from sheet aluminum, i have acess to a Tig and have a bridgport, so i could do it...but i'd like to do it using as many factory parts as possible to keep costs down. (as well as to keep from spending 30+ hrs on an intake) thoughts?, comments? Regards, James
_________________ Psychotic Gearhead/Redneck/Mekanik
94 Olds 442 Twin engine's! 6.9L/425 cu inches and 12 cylinders!
13.81 @ over 98 MPH! consistent 1.9s 60'! |
|
|
|
|
|
|
Turbocharged400sbc
|
Posted: Sun Apr 02, 2006 11:17 pm |
| TOC Member |
|
|
Joined: Wed Aug 18, 2004 12:53 am
Posts: 326
|
OK i admit it I goofed...when measuring the intake manifold spacer thickness...i set the intake on the block...the real thickness (surface to surface) is ~ 1 5/32's inches!!! the end oil seals would have to be 1 inch (redid my math and this is fer sure since the head's are now 1 inch higher due to the tall deck block)
i cant wait fer you to see the pics of how high the intake sits!
sooo i have to make some reaallly thick intake spacers or i just go ahead and section the L36 LIM into two port flanges, run my own coolant hose path's and weld a plate down the center for the new "Floor" of the intake plenum, now this may be the best way to go about this, though i would loose the benifite of over 1 inch phenolic spacers, going over 1/2 inch thickness with that stuff gets expensive reallly quick, and i can get 1/4 inch alumin sheet and TIG it fer less than that fer sure, my labor comes cheap to me
the other thing i noted other than the UIM being really tall with the spacer method is thet the bolt holes in the LIM would have to be slotted because of the bolt angle to the head face. this problem goes away if i just fabricate a wider LIM using as much of the factory unit as i can (but believe me i would run external coolant lines, that would seriously reduce LIM temps in and of itself)
I have a crapload of pics of my mockups with SI brackets and SII brackets...guess what other than some tomfoolery with coolant routing (aka the SII alternator bracket vs the SI) almost all the brackets interchange...and the 00 impalla L36 alternator/tensioner bracket bolted onto teh head shows that the tensioner pulley lines up perfectly with the SI T chain cover Water pump pulley...so belt routing may not be as bad as i think.
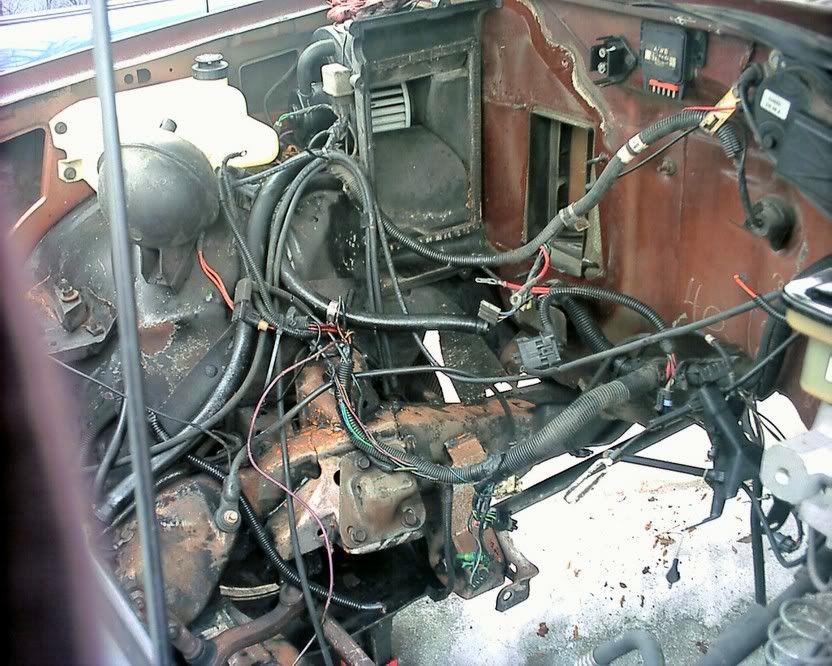
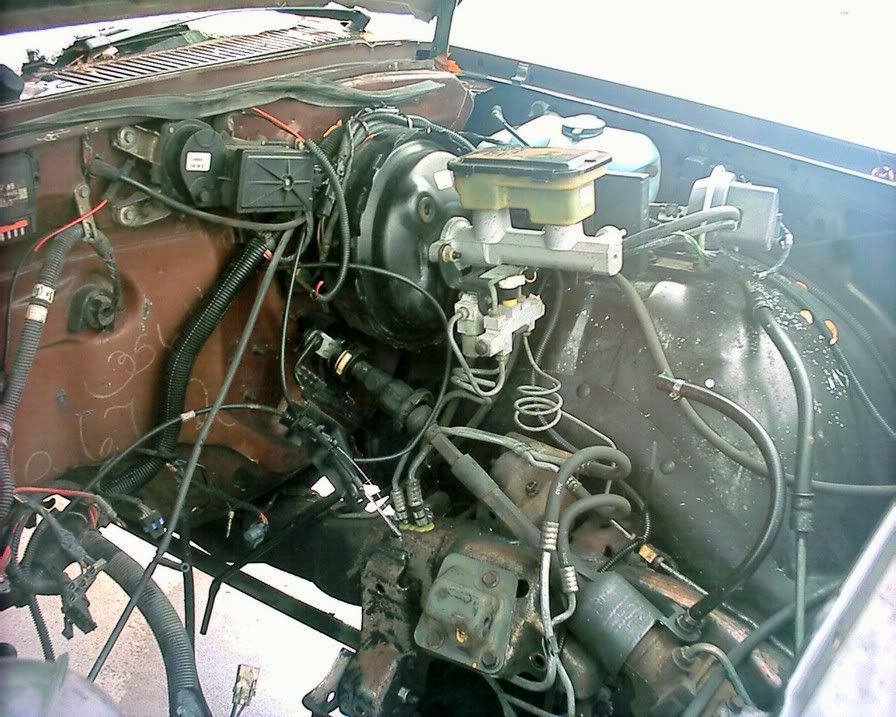
I would appreciate pics of any of your cars that are similar to these makes/models 00 impalla L36, 00 L67 (W and H bodies) and 93 regal's 3800 SI, so that i may see what brackets would be the best, as far as the compressor, alternator, P/S mounting brackets as well as the belt routings, i will be looking in Mitchell OnDemand when i get to work but usable pics would be appreciated.
Wait till ya'll see the new High res pics (soon!)
Regards, James
_________________ Psychotic Gearhead/Redneck/Mekanik
94 Olds 442 Twin engine's! 6.9L/425 cu inches and 12 cylinders!
13.81 @ over 98 MPH! consistent 1.9s 60'! |
|
|
|
|
|
|
|
 |
|
 |
|
You cannot post new topics in this forum
You cannot reply to topics in this forum
You cannot edit your posts in this forum
You cannot delete your posts in this forum
|

|